
1c. Use voice leading techniques
In this lesson topic, you’ll use voice leading techniques to create three different voicings of a chord progression. The chord progression is written on page 8 of your PDF workbook.
You can approach this exercise either by writing your voicings on the manuscript provided in your workbook, by using music notation software or completing them at the piano. Whichever method you choose, the main goal is that you gain practical experience with voice leading and a deeper understanding of how to create effective and musical chord progressions at the piano.
The lesson topic is structured into two parts. In the first part you’re given a case study which outlines a series of steps you can take to work out an effective voicing for the chord progression. In the second part, you’ll turn to your PDF workbook and complete the three voicings on pages 8 and 9.
Part 1: Case Study -Arranging a four bar chord progression for piano
Imagine you’ve been given the following chord progression: C, Am, G, C. Your task is to arrange these chords for piano, ensuring smooth voice leading and distributing the notes between both hands using one of the following configurations:
- 3 voices in the right hand and 1 voice in the left hand
- 2 voices in the right hand and 2 voices in the left hand
- 1 voice in the right hand and 3 voices in the left hand
Below, you’re walked through the process step-by-step, starting first with the individual notes used in each chord and finishing with a progression that sounds smooth and connected. Study each step and actively follow along by arranging the chords yourself, replicating the steps to reinforce your understanding.
Step 1
Write out the notes used in each chord. Double the root so that your chord has four voices.
For example, if the chords in your progression are: C. Am. G. C then you might write out the notes on a scrap piece of paper like in Figure 1.1
Figure 1.1
Example of the notes used in each chord written out on scrap paper. Notice that the root of each chord is doubled.

Step 2
Work out how you wish to voice the first chord in the progression. Consider how many voices you would like to place in each hand and space the chord well.
For example, you may decide on the voicing shown in figure 1.2 for the first C chord.
Figure 1.2
Possible voicing for the first chord with three chord voices in the right hand part, one chord voice in the left hand part. The chord is spaced so there is a good distance between the bass note and the lowest note in the right hand part. The three notes in the right hand chord are placed closely together.

Step 3
Work out the voicing of the other chords
For each chord, follow these guidelines to ensure smooth voice leading:
- Keep any common notes with the previous chord in the same part.
- Move other parts by step (except for the bass, which may leap as needed).
- Ensure that the leading note resolves correctly (e.g., leading note moves to the tonic).
- Avoid consecutive 5ths and octaves between any two parts.
For example, as you work out the voicing for the second chord you might circle the notes that it has in common with the first chord on your scrap paper, (see figure 1.3 ) place these notes in the same chord voice, allowing for stepwise movement in the remaining upper part ( see figure 1.4). You would also check the intervals between every part, ensuring that there are no consecutive 5ths or 8ves occurring between parts. (see figures 1.5-1.7)
Figure 1.3
Example of circling the notes common to consecutive chords on scrap paper workings. Here, the notes C and E are common to both the C major and A minor chords, so these notes would be given to the same chord voice.

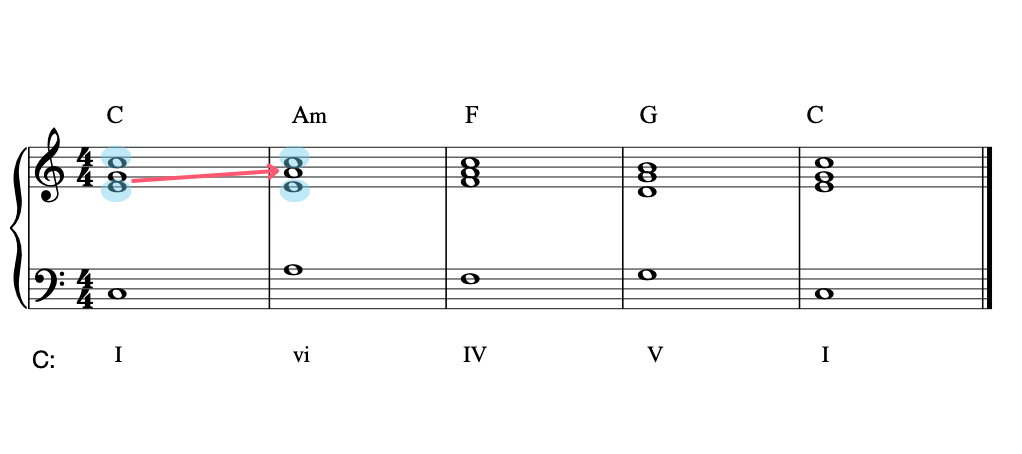
FIGURE 1.4:
Example of a possible chord voicing for the chord progression with annotations to the first and second chords to show how voice leading procedures are used. The blue highlighted notes are common to both chords and placed in the same parts. The pink arrow shows the middle chord voice moving by step as the note ‘G’ in chord I changes to the note ‘A’ in chord vi.
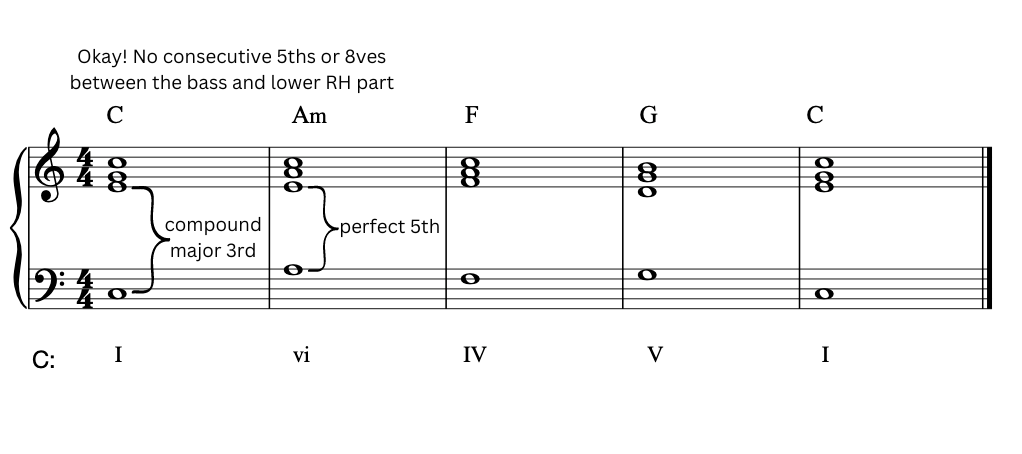
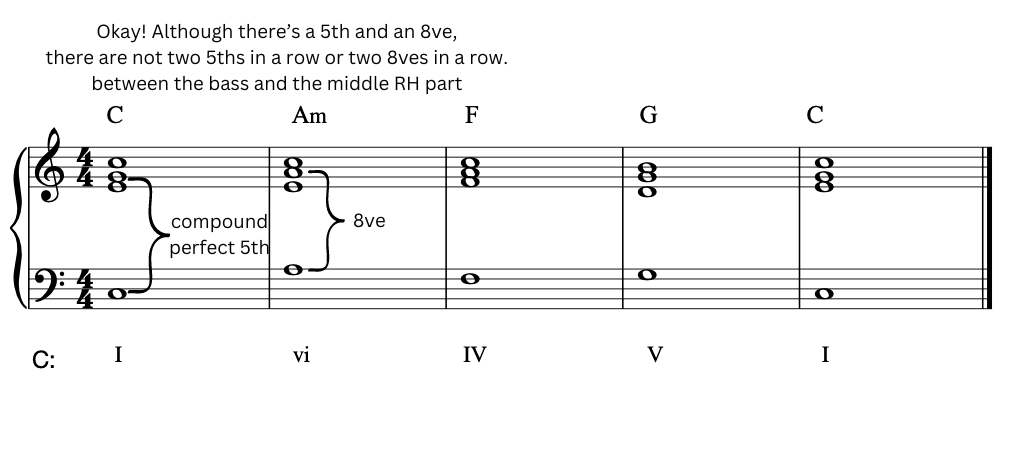
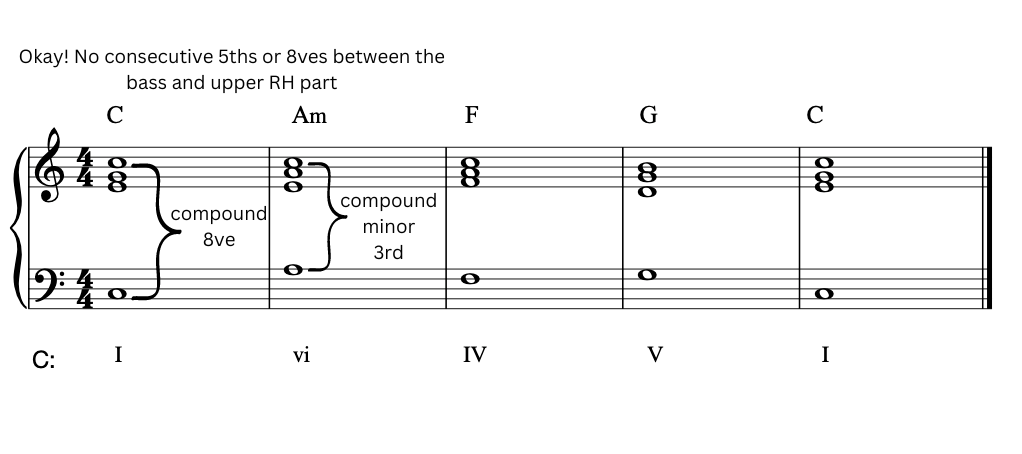
Figures 1.5 to 1.7
Examples of checking the intervals between each voice part in consecutive chords, to ensure that there are no consecutive 5ths or consecutive 8ves.
Step 4
Check your voicings
Check the work you’ve done so far to ensure that your chords are well spaced, that the leading note resolves correctly each time it is used and that you haven’t created consecutive 5ths or 8ves between any of the parts. Check that the progression sounds smooth, with each voice moving in a logical and minimal way.
Part 2: Your turn – complete the exercise in your PDF workbook
Now that you have worked through the case study, it’s time to apply what you’ve learned. Turn to your workbook, where you’ll find a new chord progression to work with. Using the same techniques demonstrated in the case study, arrange this chord progression using three different voicings as outlined in the instructions in your workbook.
Once you have finished, get feedback from your teacher about your work and then move on to the next lesson in this course.